Our oceans receive an estimated 8 million tons of plastic per year, which contributes to the ‘Pacific garbage patch,’ a growing mass of plastic debris larger than the state of Texas. Law makers and climate activists have estimated that by 2050 there will be more plastic than fish in the Pacific Ocean by weight. Plastic sandwich, shopping, and garbage bags largely contribute to this mass of growing plastic debris, as it takes roughly 10 years for plastic bags to degrade in a marine environment, and more than 100 years to degrade in a non-marine environment.
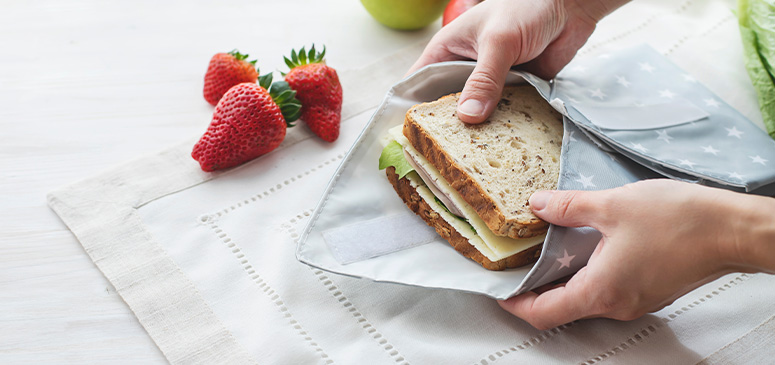
Hawaii residents generate 2.8 tons of waste per person per year, which is more waste per capita than the residents of any other state! One simple solution is to limit your household’s single use plastic consumption. Folks often turn to single use snack and sandwich bags for beach trips, hiking adventures, school or work lunches, or to store leftovers.
To help create a trash-free Hawaii and prevent more waste from entering our landfills and oceans, we invite you to get creative by using spare fabric to craft your own reusable sandwich and snack bags. Bringing your own snacks in a reusable container is a great way to save the environment and your budget. Enjoy making these DIY reusable bags to carry light snacks with you wherever you go!
Materials:
- Polyester thread
- Non-adhesive Velcro
- Nylon/cotton fabric scraps
- Scotch Guard (water resistant fabric spray)
- Quilting tape (double-sided transparent tape that can be stitched through)
- Threading needle or sewing machine
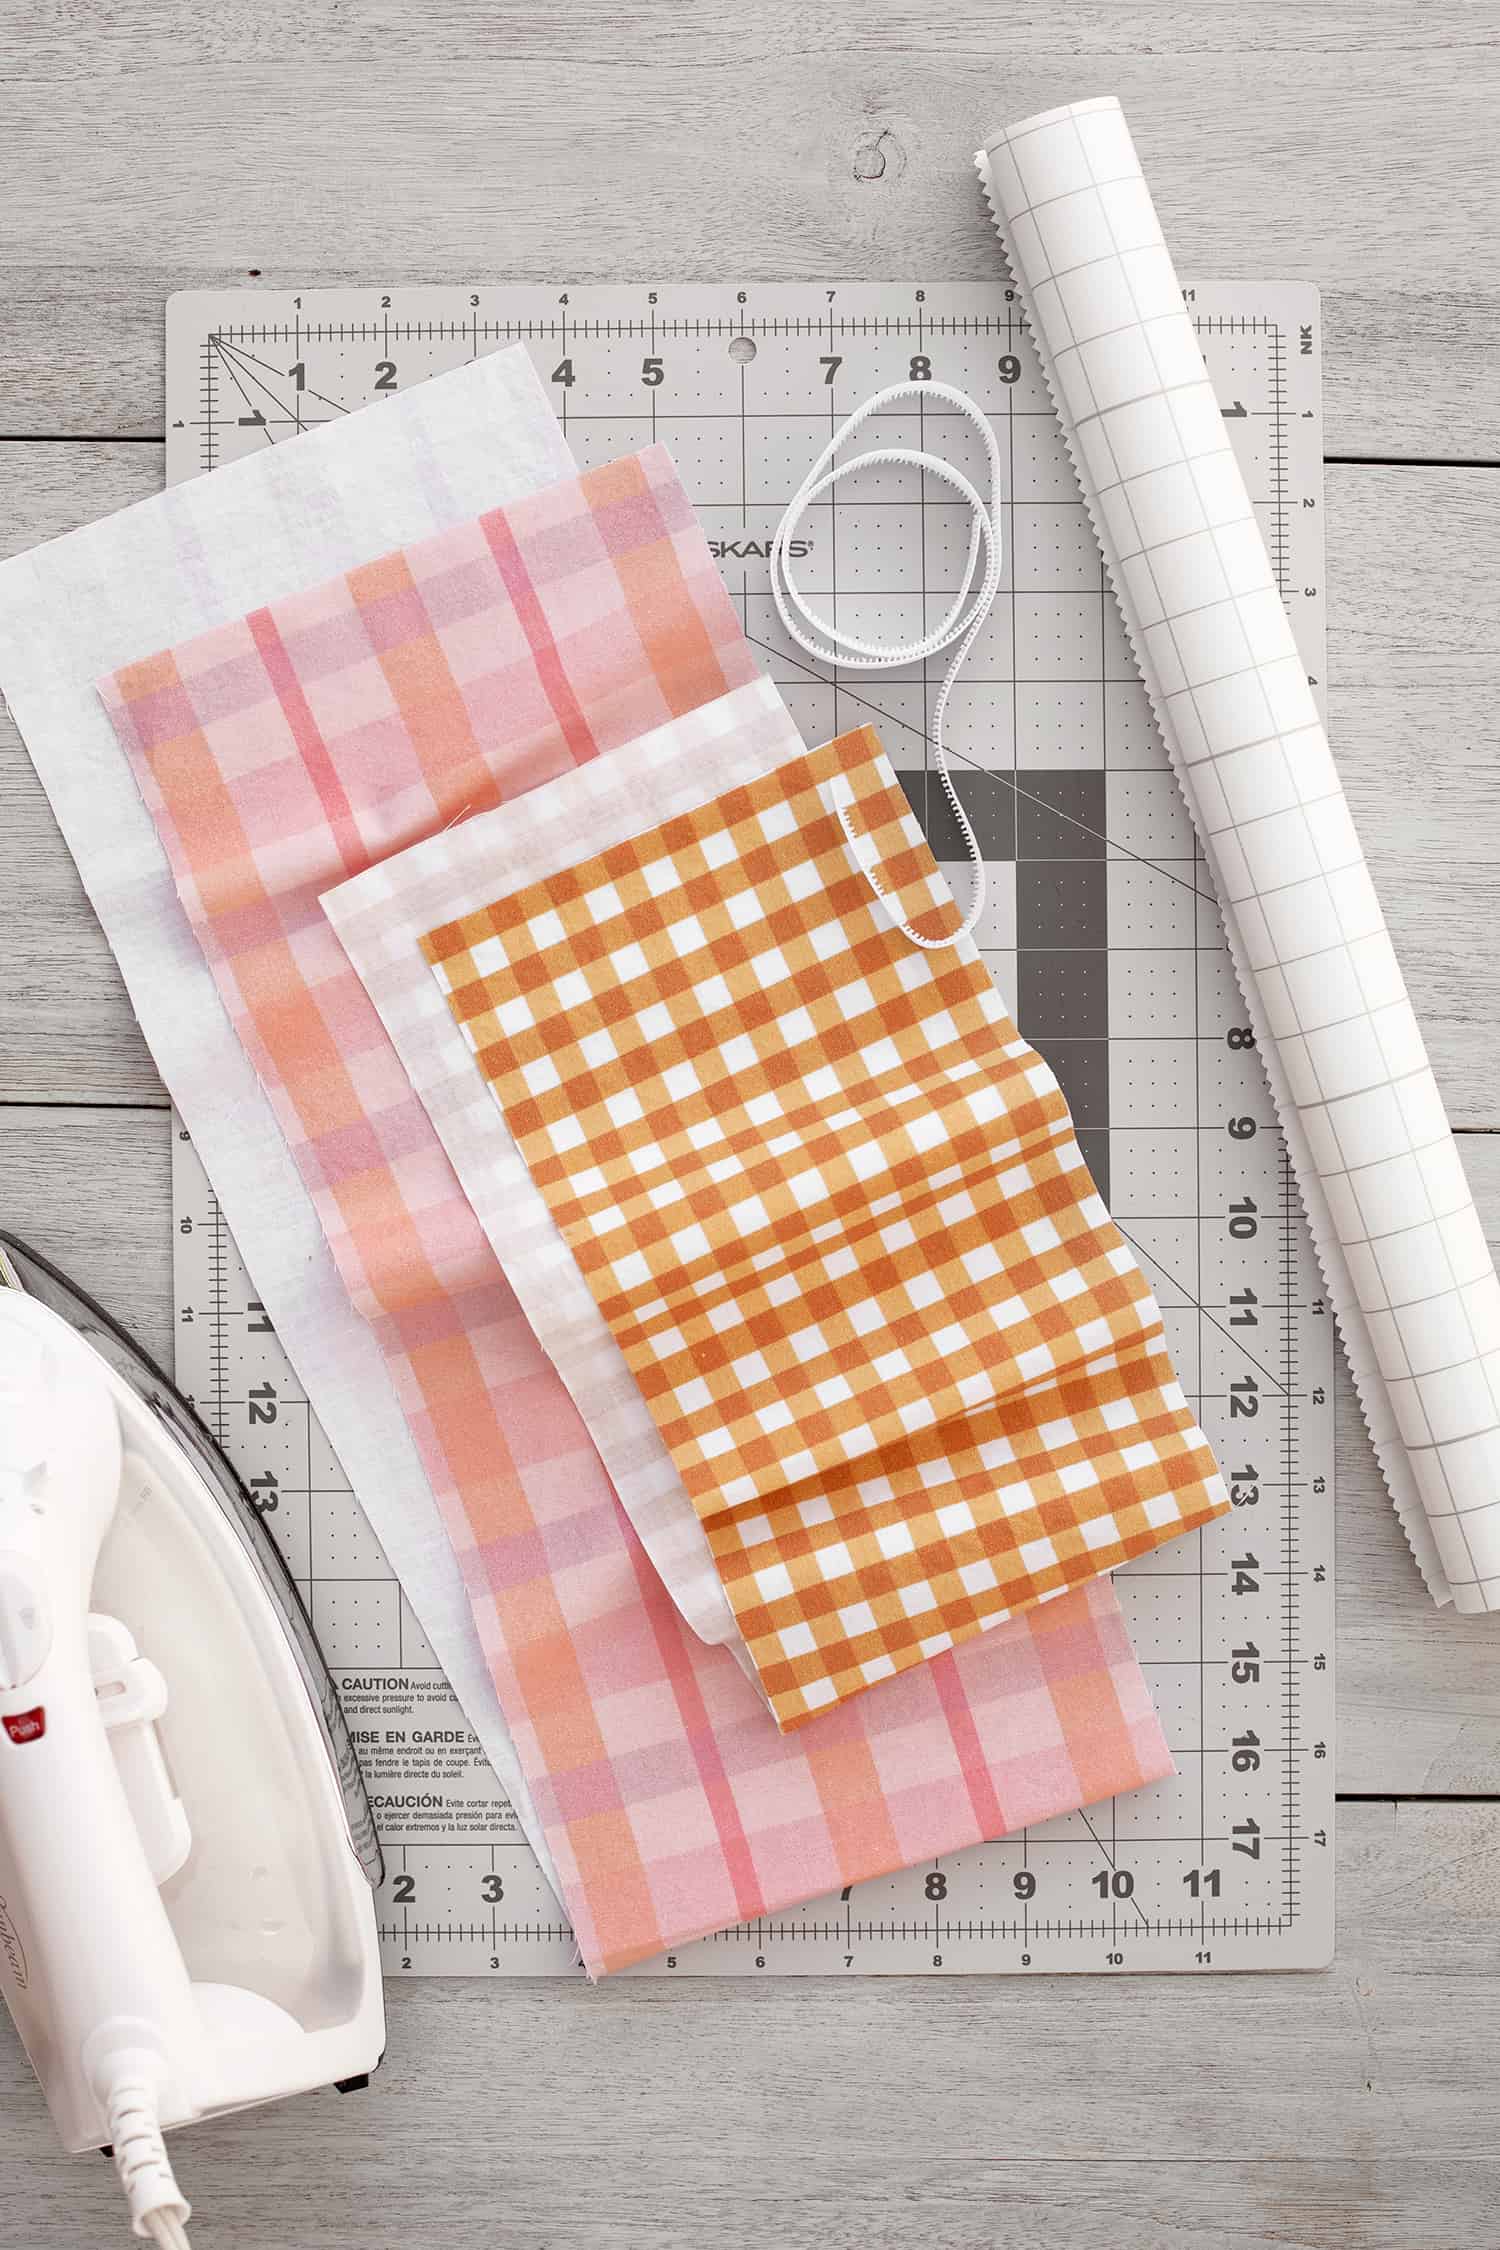
Photo by: A Beautiful Mess
Instructions:
- Cut two pieces of the fabric scraps into 6.5in. x 11.5in. so there are two rectangle fabric pieces. Spray both sides of the scraps with scotch guard, let dry for a few seconds.
- Place the two fabric rectangles on top of each other, then sew the two long sides, and one short side together at a quarter inch, leaving one of the shorter ends open.
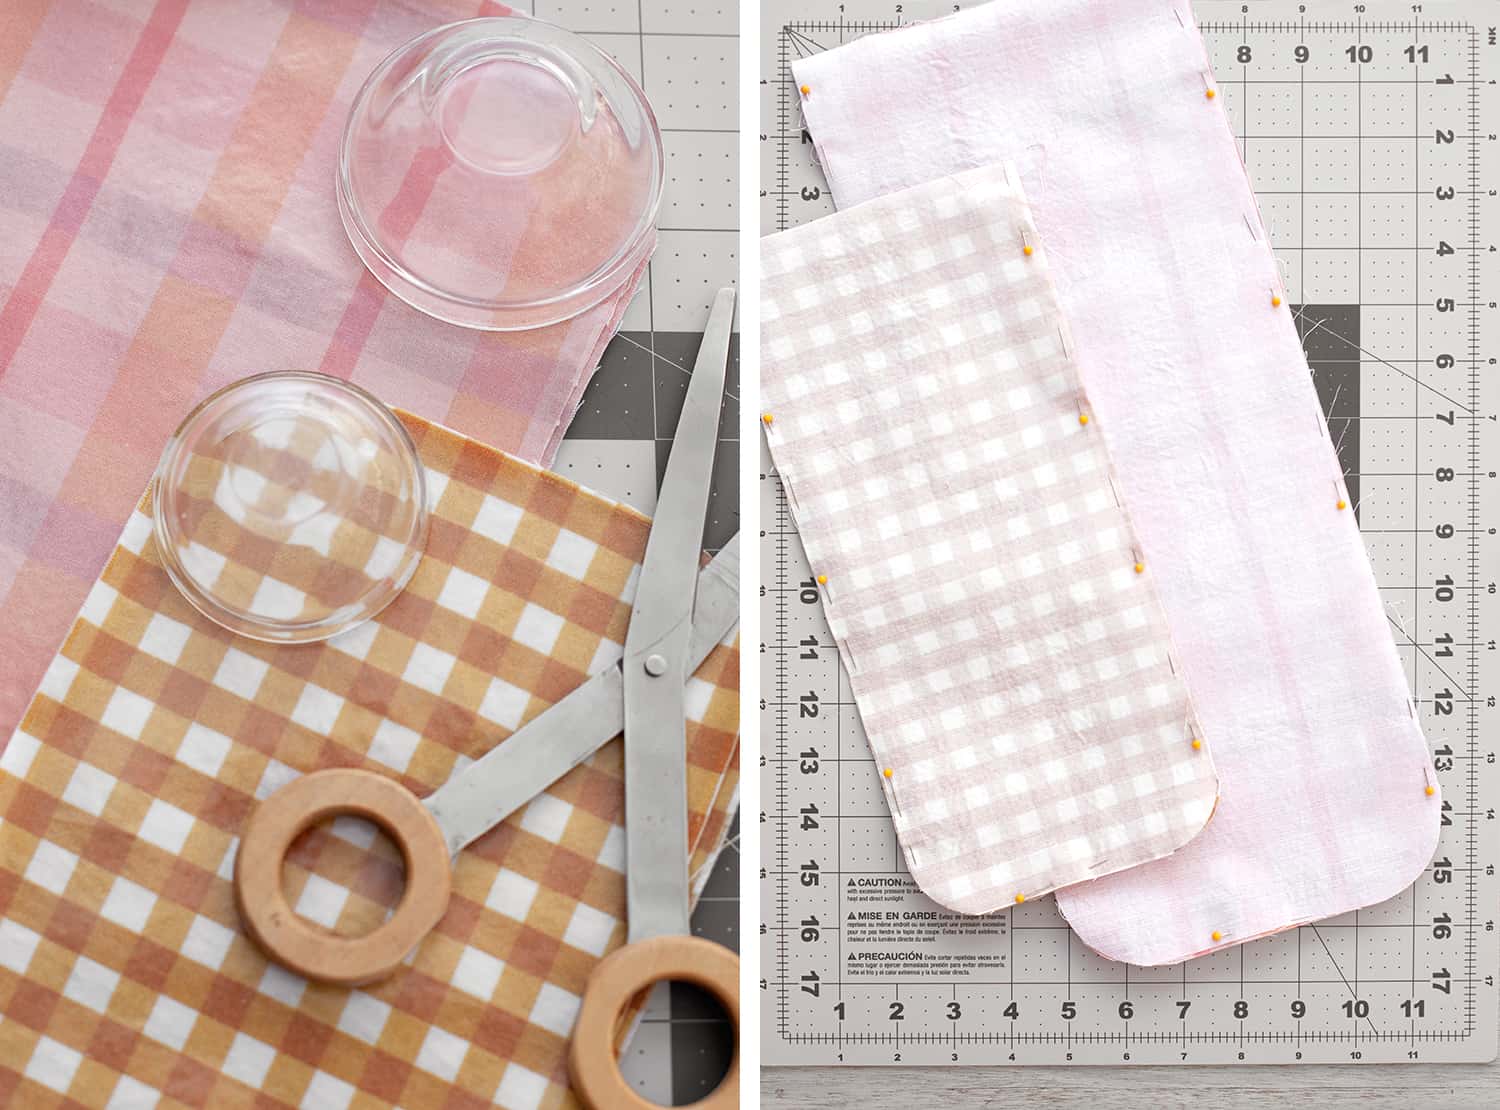
Photos by: A Beautiful Mess
3. Trim or buff out the corner ends to clean up the bag and turn the bag inside out.
4. Measure out two Velcro strips at 6inches
5. Sew one Velcro strip to the bottom of the closed short end of the bag.
6. Flip the bag so the side without Velcro is facing you.
7. Sew the second Velcro strip to the open portion of the bag, so that there is a Velcro strip on each end, and only one on each side.
8. Fold the bag upwards, nearly in half, bringing the open-ended side of the bag to the closed end of the bag.
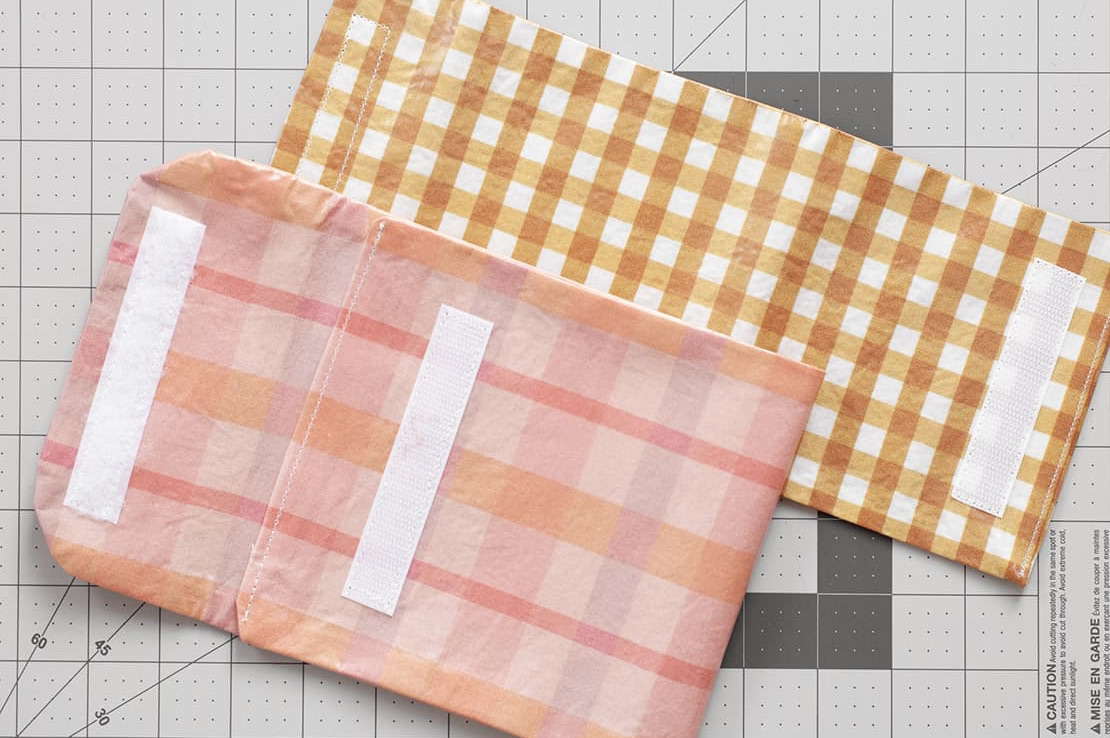
9. Make sure the Velcro strips line up so that the closed end can fold over and the bag can close properly.
10. Sew the sides of the folded bag shut.
11. The final product should be a 5 to 5.5in. double-layered fabric bag!
12. Spray the final product with another scotch guard layer.
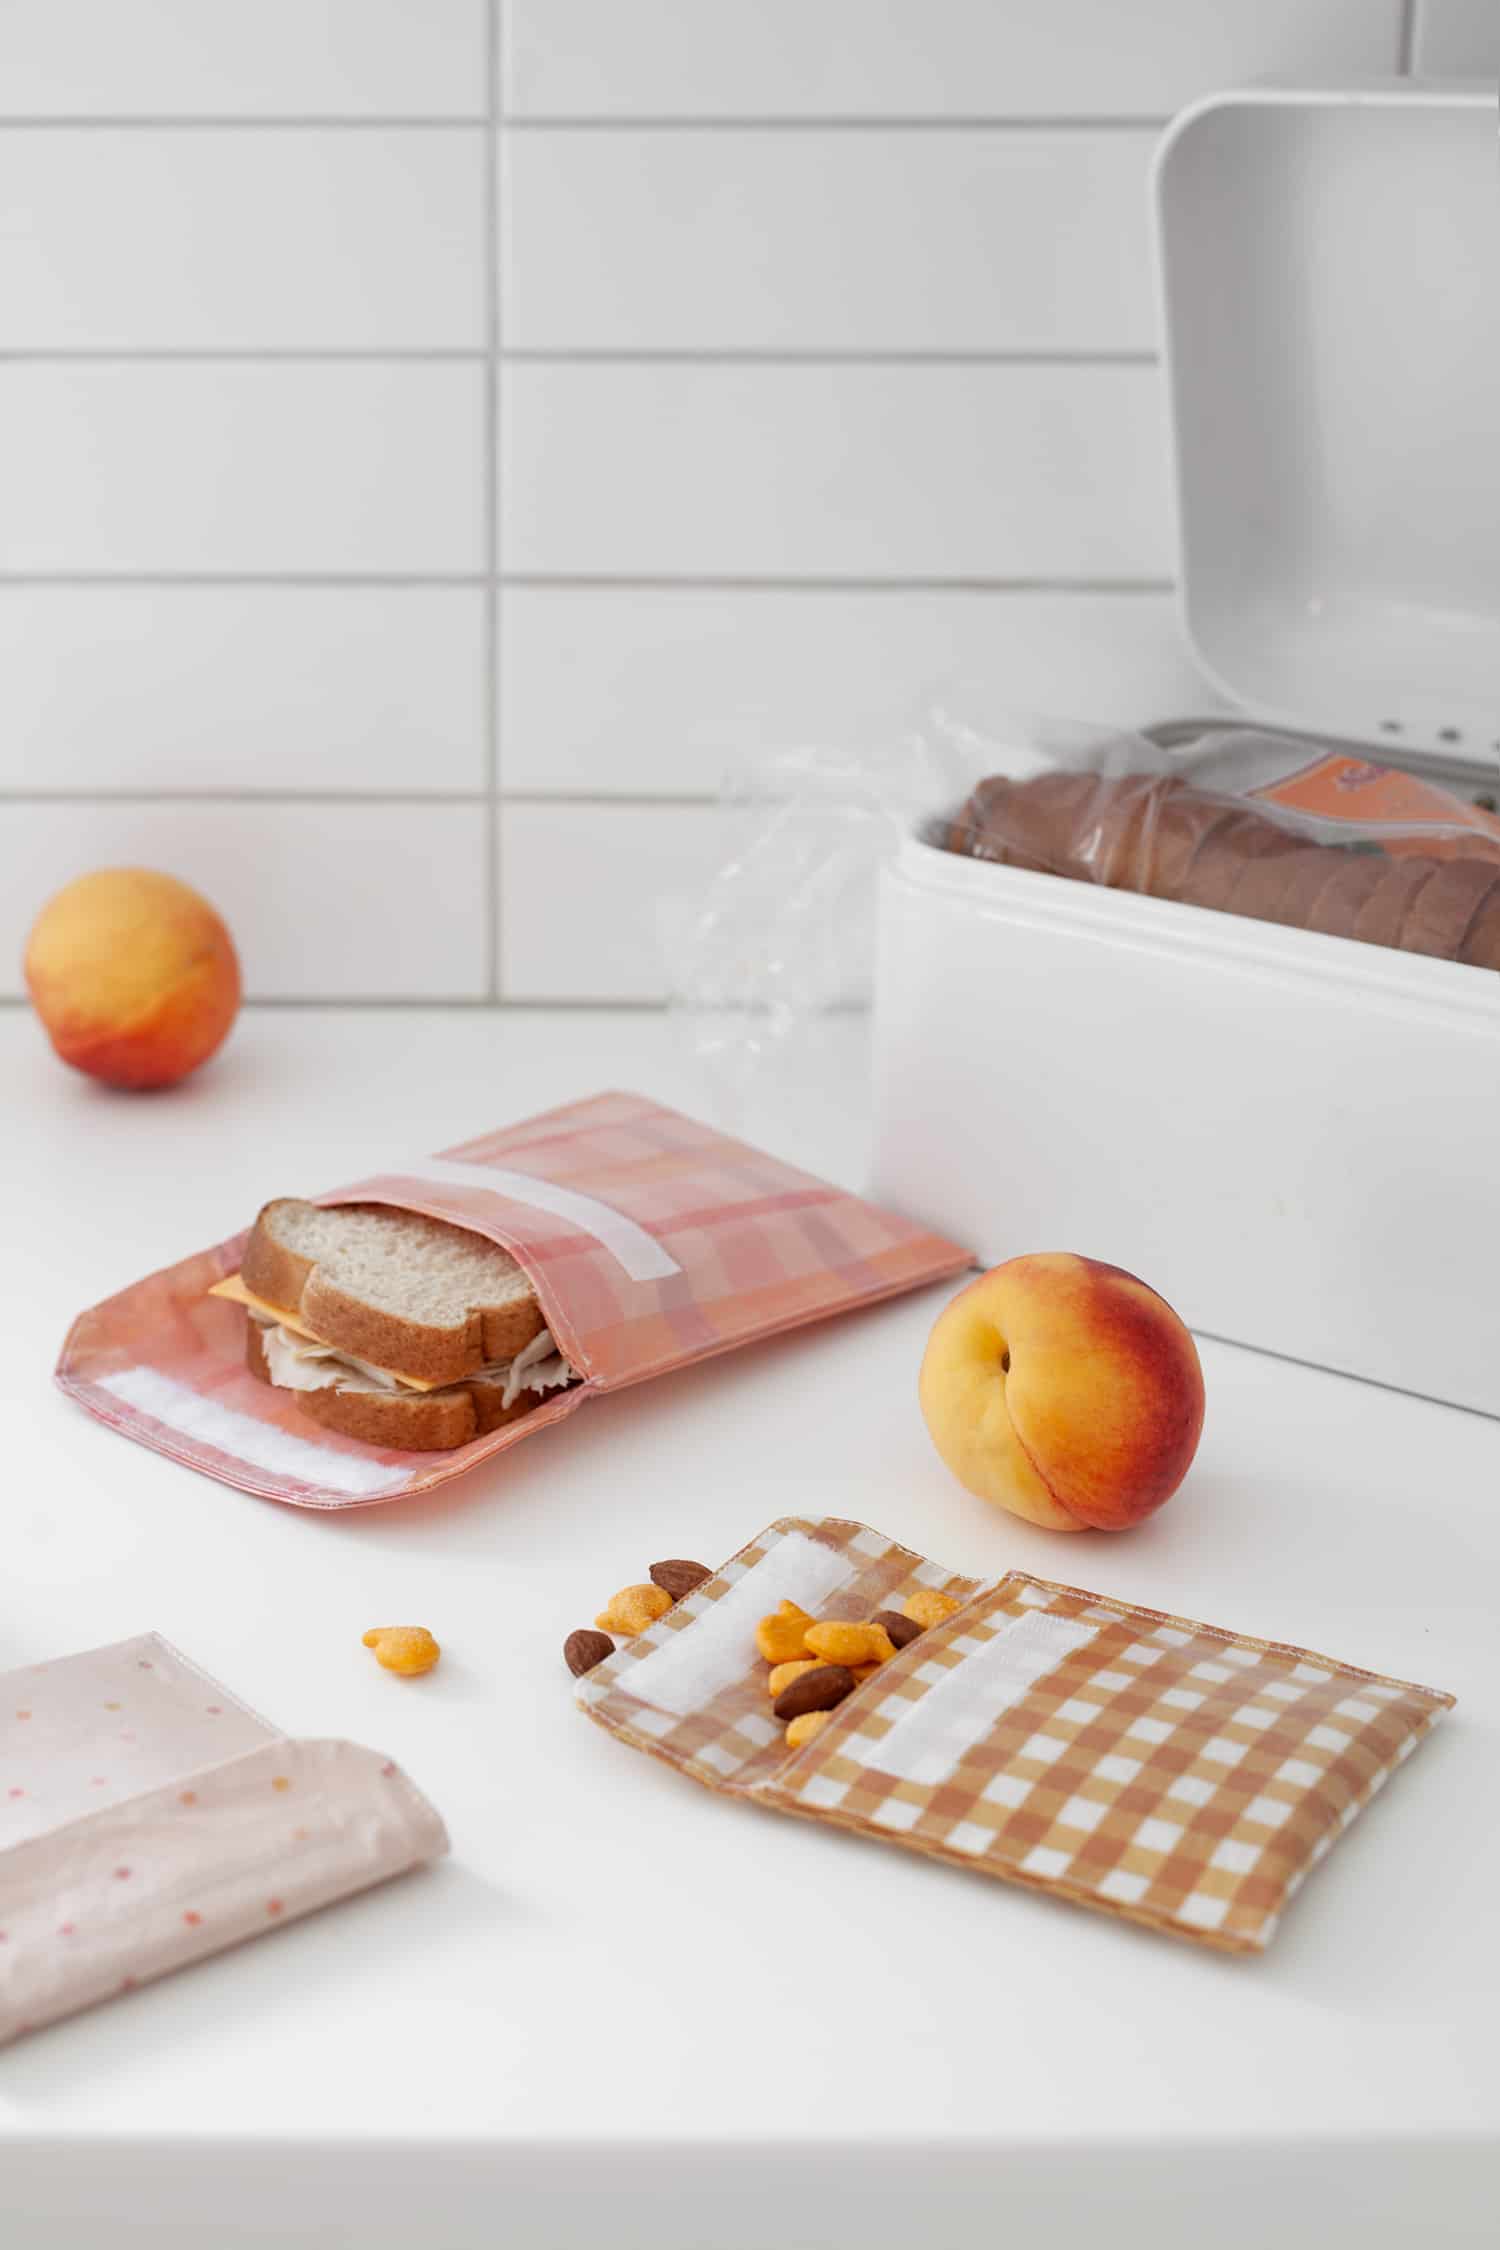
Photo by: A Beautiful Mess
Sources:
NOAA Ocean Service, Center for Biological Diversity, American Chemical Society Publications, Hawaii State Legislature, A Beautiful Mess,